Day 2: A Deep Dive into Implementing AWS WAF for Unrivaled Web Application Security, Auto-Scaling and load balancing:

AWS Well Application Firewall (WAF), a cloud-based security service offered by Amazon Web Services (AWS), is designed to protect web applications from a wide range of online threats. It acts as a protective shield, safeguarding web applications and the data they process from malicious actors and vulnerabilities. The subsequent sections below provide a comprehensive overview of AWS WAF, from its fundamental concepts to best practices and pricing.
AWS WAF helps you protect against common web exploits and bots that can affect availability, compromise security, or consume excessive resources.
How AWS WAF Works:
AWS WAF acts as a protective layer for your web applications, allowing you to define and enforce security rules to filter and control incoming web traffic, thereby minimizing the risk of common web vulnerabilities and attacks.
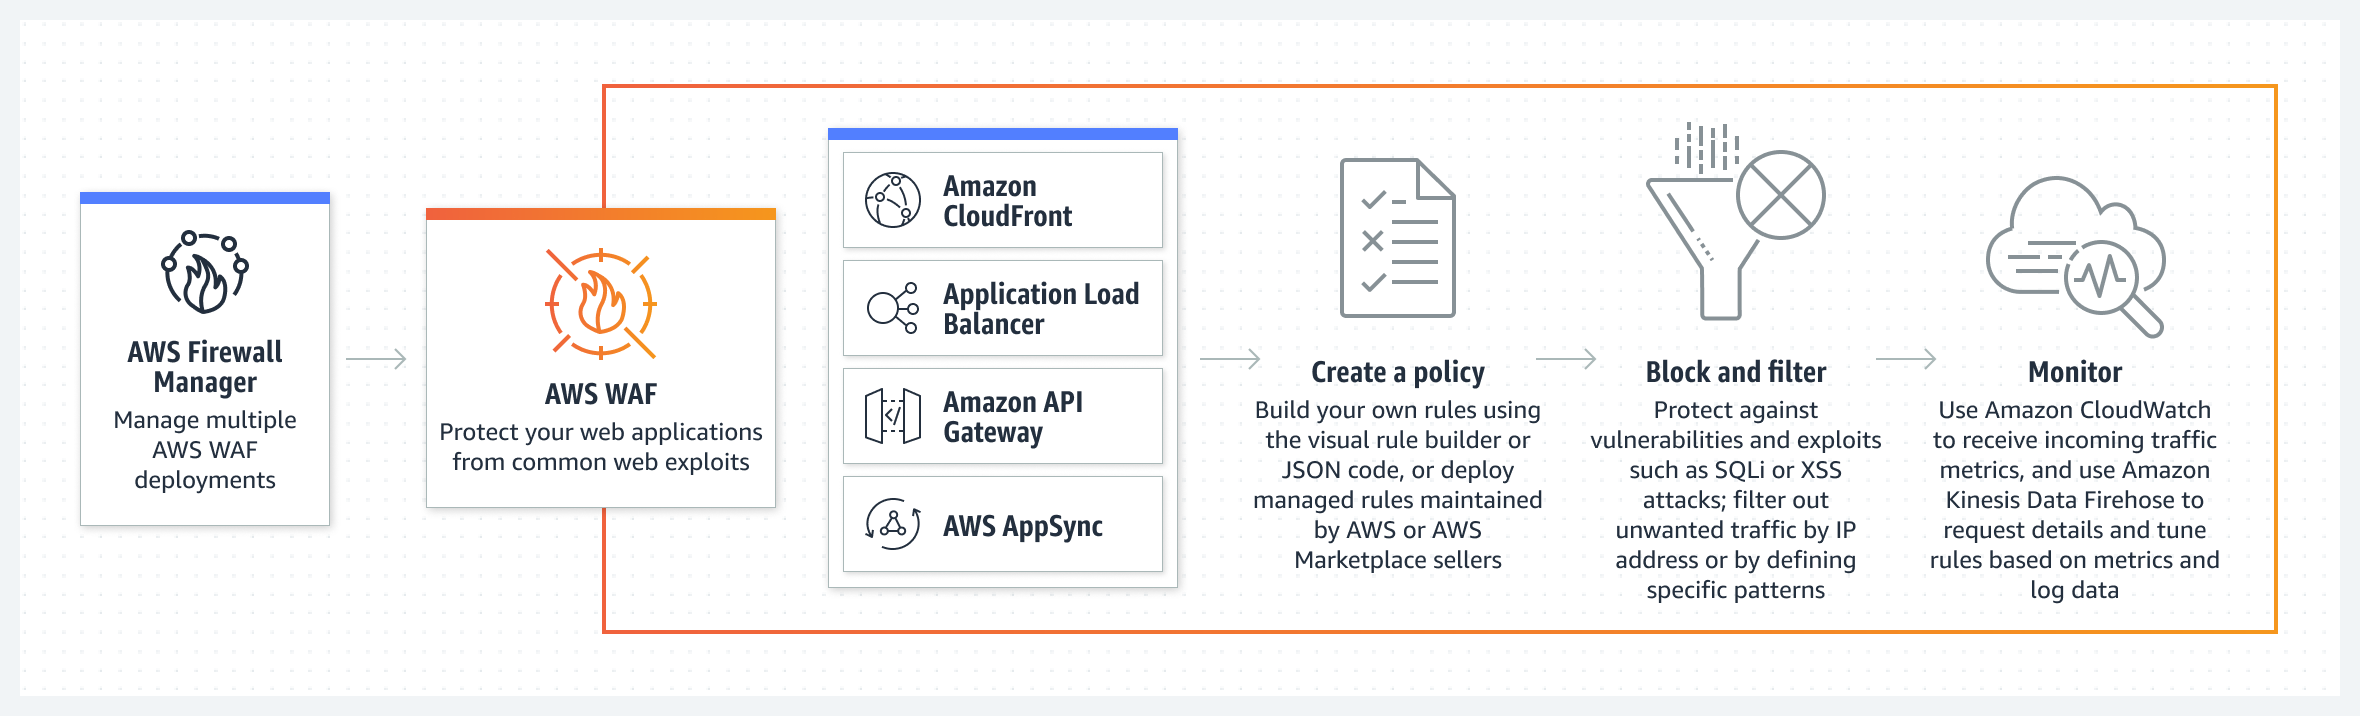
Here's an overview of how AWS WAF works:
Web ACL (Access Control List) Creation:
You start by creating a Web ACL, which is a set of rules that defines the conditions under which a web request is allowed or blocked.
Each rule within the Web ACL specifies a condition, such as the presence of a specific string in the request, the source IP address, or the type of web browser.
Rule Evaluation:
AWS WAF allows you to create rules that define the criteria for blocking or allowing requests. These rules are evaluated in a specified order.
Rules can be based on IP addresses, geographic locations, SQL injection patterns, cross-site scripting (XSS) patterns, and more.
Conditions and Filters:
Conditions are used to define the logic of each rule. For example, you can create conditions to check if a specific string exists in a request or if the request originates from a particular IP address.
Filters can be applied to condition values to further refine the matching criteria.
Web Requests Filtering:
When a web request is made to your application, it passes through the AWS WAF service.
The rules and conditions in the Web ACL are then applied to the request to determine whether it should be allowed, blocked, or flagged for further action.
Action Execution:
Based on the evaluation of rules, AWS WAF takes predefined actions. Actions can include allowing the request, blocking the request, or counting the request (logging without blocking).
Additionally, you can integrate AWS WAF with other AWS services, such as AWS CloudFront, to distribute your web application content globally and apply WAF protection at the edge locations.
Logging and Monitoring:
AWS WAF provides detailed logging that allows you to monitor web traffic and the actions taken by the WAF rules.
You can use AWS CloudWatch Logs to store and analyze these logs, gaining insights into potential threats and patterns of malicious activity.
Managed Rules and Custom Rules:
AWS WAF offers a set of managed rulesets that are continuously updated to protect against common threats. These rulesets cover issues such as SQL injection, cross-site scripting, and more.
You can also create custom rules tailored to the specific requirements of your application.
Project: Implementing AWS WAF for Web Application Protection
Step 1: Create Lunch Template
Navigate to the EC2 Console: In the EC2 dashboard, select "Launch Templates" from the left navigation pane.
Click the "Create launch template" button.
Configure Launch Template:
Fill in the required details for your launch template:
Launch template name: Give your template a name.
Version description: Provide a description for this version.
AMI: Choose the Amazon Machine Image (AMI) for your instances.
Instance type: Select the type of instance you want to launch.
Key pair: Specify the key pair for accessing the instances.
Advanced Details:
Expand the "Advanced details" section to configure additional settings such as user data.
   #!/bin/bash

   # Update the package list
   sudo apt-get update -y

   # Install Docker
   sudo apt-get install -y docker.io
   sudo systemctl start docker
   sudo systemctl enable docker

   # Pull the Docker image from your DockerHub
   sudo docker pull aesha29/dnf_img:latest

   # Run the Docker container, exposing port 8001
   sudo docker run -d -p 80:8001 aesha29/dnf_img:latest
Save the template.
Step 2: After that creating Load Blancer
In the EC2 Dashboard, navigate to "Load Balancers" and click "Create Load Balancer."
Choose "Application Load Balancer" and configure the settings, including listener configurations.
Follow the below Steps:
configure the setting and create the auto scaling group.

select the VPC you want.

Now configure the advance options and attach the load balancer.


After that selecting the group size you want.


After that got to the Load balancer you create the load balancer successfully.

http://<Your_Load_Balancer_DNS_Name>:80
Replace <Your_Load_Balancer_DNS_Name> with the DNS name of your Application Load Balancer. If everything is configured correctly, you should see your app in action.


